Installation
Installing procedure is tested only for Ubuntu 12.04+ and other debian-derived systems but general steps should work for other systems
Installing on Debian / Ubuntu
Installation steps one by one.
1. Installing TurboGears
TurboGears is meant to run inside python virtualenv and provides its own private index to avoid messing with your system packages and to provide a reliable set of packages that will correctly work together. First install python & python-virtualenv:
$ sudo apt-get install python
$ sudo apt-get install python-virtualenv
Running virtualenv with the option –no-site-packages will not include the packages that are installed globally. This can be useful for keeping the package list clean in case it needs to be accessed later.:
$ virtualenv --no-site-packages tg2env
in this tutorial we assume that you are in your home directory (~/ or /home/username) but you can choose your own directory for installation destination.
To begin using the virtual environment, it needs to be activated:
$ source tg2env/bin/activate
(tg2env)$ cd tg2env           #now you are ready to work with TurboGears
Be sure that you are in virtualenv mode during all installation procedure.
Install turbogears:
(tg2env)$ pip install tg.devtools
Start the project:
(tg2env)$ gearbox quickstart molgears
Delete unneeded files created by quickstart. We will replace it later by our project:
(tg2env)$ rm -rf ~/tg2env/molgears/molgears
Download molgears project from githubhttps://github.com/admed/molgears to ~/tg2env/molgears/
or use git:
(tg2env)$ cd ~/tg2env/molgears/
(tg2env)$ git clone https://github.com/admed/molgears
- install it::
- (tg2env)$ python setup.py install
2. Build rdkit from source code with INCHI support
Read the rdkit docs Install for more informations.
Installing prerequisites
Install the following packages using apt-get:
flex bison build-essential python-numpy cmake python-dev
libboost-dev libboost-python-dev libboost-regex-dev
Setting environment variables
RDBASE: the root directory of the RDKit distribution (e.g. ~/RDKit):
export RDBASE="/home/username/RDKit"
LD_LIBRARY_PATH: make sure it includes $RDBASE/lib and wherever the boost shared libraries were installed:
export LD_LIBRARY_PATH=$LD_LIBRARY_PATH:$RDBASE/lib
PYTHONPATH: make sure it includes $RDBASE:
export PYTHONPATH=$PYTHONPATH:$RDBASE
Building the RDKit
Fetch the source, here as tar.gz but you could use git as well:
wget http://downloads.sourceforge.net/project/rdkit/rdkit/QX_20XX/RDKit_20XX_XX_X.tgz
for download the latest version (Q3 2014):
(tg2env)$ mkdir ~/RDKit
(tg2env)$ cd ~/RDKit
(tg2env)$ wget http://downloads.sourceforge.net/project/rdkit/rdkit/Q3_2014/RDKit_2014_09_1.tgz
unpack the archive:
(tg2env)$ tar -xvf RDKit_2014_09_1.tgz
move files to ~/RDKit directory:
(tg2env)$ mv RDKit_2014_09_1/* ~/RDKit
Download InChi:
(tg2env)$ cd ~/RDKit/External/INCHI-API
(tg2env)$ ./download-inchi.sh
Building:
(tg2env)$ cd $RDBASE
(tg2env)$ mkdir build
(tg2env)$ cd build
(tg2env)$ cmake -DRDK_BUILD_INCHI_SUPPORT=ON ..
(tg2env)$ make
(tg2env)$ make install
Testing the build (optional, but recommended):
(tg2env)$ ctest
copy rdkit directory to:
(tg2env)$ cp ~/RDKit/rdkit ~/tg2env/lib/python2.X/site-packages/
3. Download razi
Razi provides extensions to SQLAlchemy to work with chemical databases. SQLAlchemy version <= 0.9.9 is required.
Download razi from GitHub or from my fork
or by git:
(tg2env)$ cd ~/RDKit
(tg2env)$ git clone https://github.com/rvianello/razi
- install razi::
- (tg2env)$ cd ~/RDKit/razi (tg2env)$ python setup.py install (tg2env)$ cd ../
or copy razi/razi to: ~/tg2env/lib/python2.X/site-packages/:
(tg2env)$ cp ~/RDKit/razi/razi ~/tg2env/lib/python2.X/site-packages/
4. Install postgresql
To install use the command line and type:
(tg2env)$ sudo apt-get install postgresql postgresql-contrib
Basic Server Setup
In a terminal, type:
(tg2env)$ sudo -u postgres psql postgres
Set a password for the “postgres” database role using the command:
postgres=# \password postgres
and give your password when prompted. The password text will be hidden from the console for security purposes.
Type Control+D to exit the posgreSQL prompt.
Since the only user who can connect to a fresh install is the postgres user, here is how to create yourself a database account (which is in this case also a database superuser) with the same name as your login name and then create a password for the user:
(tg2env)$ sudo -u postgres createuser --superuser $USER
(tg2env)$ sudo -u postgres psql
postgres=# \password $USER
Type Control+D to exit the posgreSQL prompt.
More installation information.
Creating a database
To create the first database, which we will call “molgears”, simply type:
(tg2env)$ sudo -u postgres createdb molgears
Configuration
To improve performance while loading the database and building the index, I changed a couple of postgres configuration settings in postgresql.conf as they recommend in rdkit cartridge docs:
fsync = off                           # turns forced synchronization on or off
synchronous_commit = off              # immediate fsync at commit
full_page_writes = off                # recover from partial page writes
And to improve search performance, I allowed postgresql to use more memory than the extremely conservative default settings:
shared_buffers = 2048MB               # min 128kB
work_mem = 128MB                      # min 64kB
Change requires restart:
(tg2env)$ sudo /etc/init.d/postgresql restart
5. Build the cartridge
Go to the cartridge directory:
(tg2env)$ cd $RDBASE/Code/PgSQL/rdkit
run compilation, installation and testing:
(tg2env)$ make && make install && make installcheck
Add rdkit cartridge extension to database:
(tg2env)$ sudo -u postgres psql -c 'create extension rdkit' molgears
More info in rdkit docs and rdkit google code.
6. development.ini
Add information about your database to development.ini file. Edit the file: ~/tg2env/molgears/development.ini and comment the line:
# sqlalchemy.url = sqlite:///%(here)s/devdata.db
Than uncomment the line:
sqlalchemy.url=postgres://username:password@hostname:port/databasename
put your data like database USER name, password, hostname (or host IP i.e. 127.0.0.1), port (i.e. 8080) and databasename (in this example “molgears”)
example line:
sqlalchemy.url=postgres://mike:hiddenpassword@127.0.0.1:8080/molgears
7. Install additional libraries by pip
Install by using the command:
(tg2env)$ pip install library_name
- where libraries are::
- tw2.forms
- tw.forms
- Genshi
- SQLAlchemy==0.9.9
- zope.sqlalchemy
- webhelpers
- repoe.who
- repoze.who.plugins.sa
- psycopg2
- tgext.admin
- pillow
- paste
- xhtml2pdf
- xlwt
- xlrd
- numpy
- scipy
- matplotlib
- sqlalchemy_migrate
8. RUN your aplication
Go to molgears directory:
(tg2env)$ cd ~/tg2env/molgears
run setup.py:
(tg2env)$ python setup.py develop
(tg2env)$ gearbox setup-app
run gearbox:
(tg2env)$ gearbox serve
than you can open your browser and go to address:
http://hostname:port (i.e. http://127.0.0.1:8080).
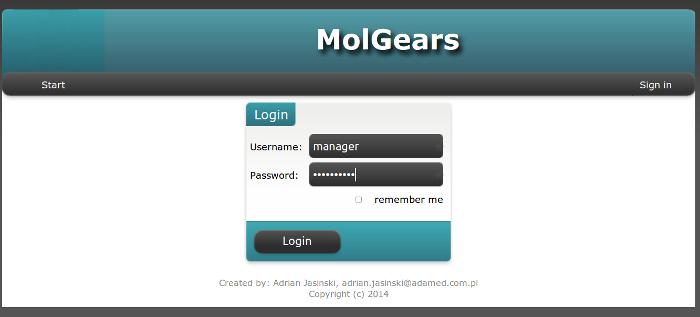
put your data:
login: manager
passwor: managepass
enjoy :)